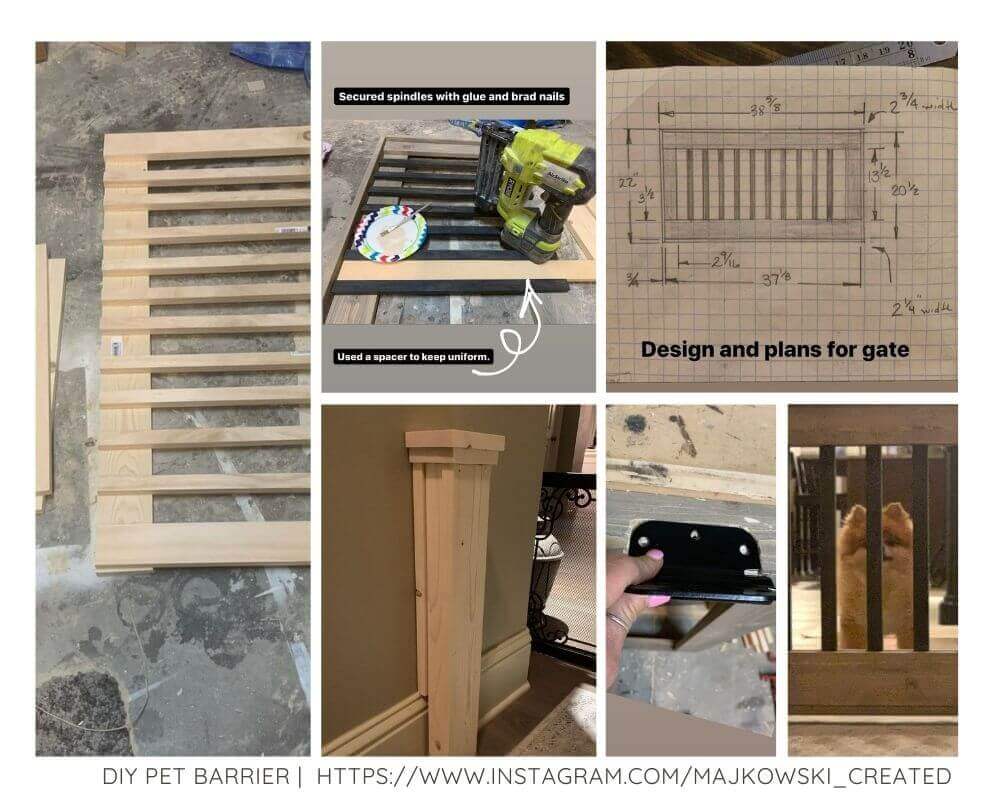
Keeping your pet contained is important, especially if you have small children or places in your home that are off-limits. While plenty of pet barriers can be found in the pet store, you can easily make one yourself for much less.
In fact, you can make a barrier for your pet with a few items you probably already have laying around in your garage, or at least a few simple items from your local hardware store.
We have put together a list of the top 7 DIY pet barriers for home ideas tutorials.
1. Homemade Fabric Dog Gate
Credit: Sewmanyways.blogspot.com
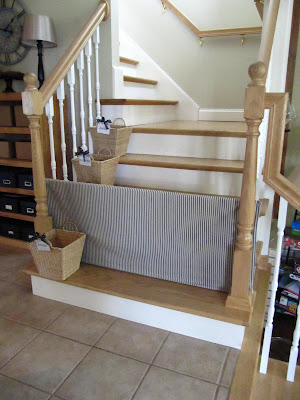
For families that have puppies, older dogs, or docile pets, a fabric pet barrier is a simple way to limit their roaming. This DIY barrier from Karen at SewManyWays is great to slide in between the spindles of your stairs when you need to block off the way. It’s also long enough and not too high. She built this staircase pet barrier for Annie, her 10 year old yellow lab.
Another bonus is that not only is this an affordable fix, but you can also customize the look of the barrier to match your surroundings with ease.
What You’ll Need
- two long and two short lengths of PVC pipe
- four PVC corner pieces.
- a length of your favorite fabric in any pattern that matches your decor, many of which can be found on Amazon.
How To Build It
Making this fabric barrier is simple.
- First, measure the width of your stairs, and then take a measurement of how tall you would like your barrier to be. For smaller dogs and older dogs, about knee height should suffice, but if you have puppies that jump, you might want to go a bit higher.
- Once you have your measurements, cut your PVC pipe to length. If you don’t have a saw at home, the hardware store will cut them to your measurements when you buy the pipe.
- Attach the pipes at the corners using the corner joints. You can use a hammer to secure the ends if needed.
- Now that your frame is complete, you will need to measure the length around the entire frame before cutting your fabric. Add an extra half-inch to your final measurement to account for the seams.
- Cut the fabric in one large according to your needs. If required, you can also use two larger pieces.
- Sew three edges together, and then slide the fabric over the frame like a pillowcase. You can sew the final end shut, or you can leave it open if you want to swap different fabrics occasionally.
2. Rustic Indoor DIY Dog Fence
Credit: Homeroad.net
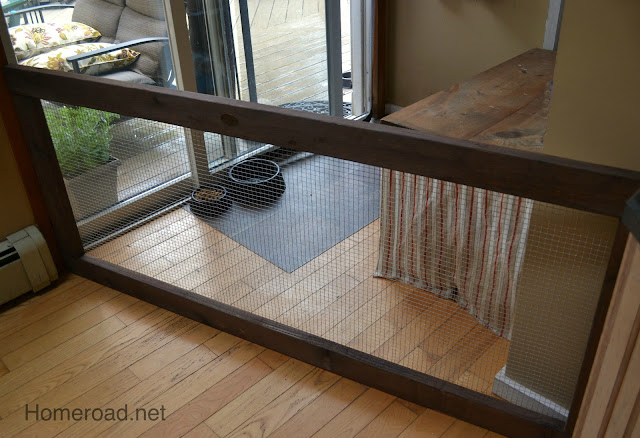
Do you have an extra-wide space that you need to block off? If so, then a rustic dog fence will handle the job with flair and style. This dog barrier made by Susan at Homeroad is not only stylish, it will prevent creative pets that like to climb from getting into places they should not be. An added bonus is that this style can fit extra wide entryways with ease.
What You’ll Need:
- Metal Screening
- Screws
- Washers
- Four 2 x 4 Planks
- Paint or wood stain
How To Build It
- Measure out your space and then cut your 2 x 4’s accordingly. You will also need to measure and cut the metal screening to size to go in the center of your barrier.
- Nail or screw the wood planks together to make the frame. You can stain or paint the wood according to your preference.
- Next, attach the metal netting with heavy-duty wood staples and washers all along the back of the fence. This will prevent climbing and also secure the screen to the barrier.
- You can install the fence on a hinge or for easy movement, attach small wheels to the bottom to slide it open and closed as needed.
3. DIY Wood Dowel Door for Dogs
Credit: Newlywoodwards.com
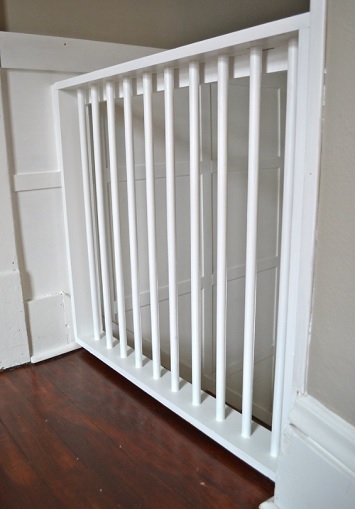
If you are looking for something that fits in more with your home decor, then a wood dowel pet gate like this from Newly Woodwards is a great option. You can use straight dowels or fancy dowels, whichever you prefer. Since you will be painting these to match the room, the sky is the limit when it comes to color options. These work to keep medium and large dogs out or in any room in your home.
What You’ll Need
- Six 1 x 4 Planks (Pine or your preference),
- 3/4′ Dowel Rods,
- Two piano hinges, and
- one bolt closure
How To Build It
Building this pet gate is not difficult, but you will need a few tools and some patience.
- To start, measure your door or stairway.
- Once you have the measurements, cut all of your planks to the proper length and height. You will need four planks to make the frame, and one more as additional support at the top of the frame which will be placed behind the dowels.
- After cutting your planks, you will then need to measure and cut your dowels to the proper height. Leave an extra half-inch on the top and bottom of each dowel as these ends will fit into the frame.
- On the top and bottom planks, mark out the spacing for each dowel. Depending on the size of your dog, they can be spaced further or closer together.
- With a dowel tool on the end of your drill, make a small hole in each marked spot on both planks. The dowels will be inserted at each end.
- Go ahead and attach the dowels in their spots using wood glue. Allow the glue to cure and dry completely.
- If you want a stronger hold, you have the option of nailing or screwing the dowels into the planks, but the finished look won’t be as clean.
4. The 10-Minute Pet Gate
Credit: FindingPurposeBlog.com
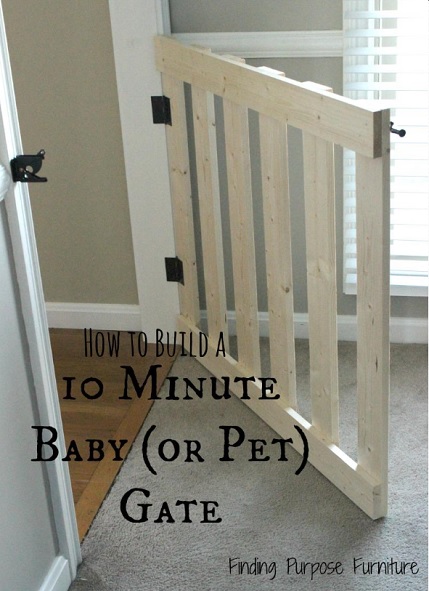
Making a pet gate on your own can save you money, but if it takes too long to complete, it may seem like more work than it’s worth. We found a simple pet gate on findingpurposeblog that you can complete in about ten minutes that will keep your furry friends easily corralled.
What You’ll Need:
How To Build It
- Measure your pine planks to fit the size of the opening you want to cover. You will need two for the frame, and a few more to make up the lattice.
- You can cut the boards to size on your own or have the hardware store do it for you.
- Lay all your boards out flat with your frame boards at the top and bottom laying on the floor.
- Place the other planks in a row evenly spaced on top of the two frame boards. They should resemble a simple jail cell pattern.
- Take heavy-duty screws and affix the planks to the frame boards at the top and bottom.
- You can then stain or paint the barrier if you prefer, or can leave it as is.
- Next, attach two hinges to one side of the frame and affix it to your entryway.
- On the other side, install an auto-latch at the top of the barrier to complete your project.
5. Dutch Door Pet Gate
Credit: PineandProspectHome.com
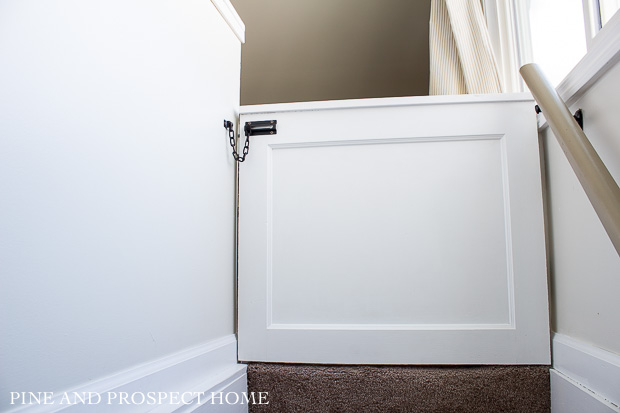
Have you ever wondered what to do with that old door lingering in your attic or garage? Are you interested in a weekend DIY project and need a pet barrier to contain your furry friend? If so, then a Dutch door pet gate like this tutorial from pineandprospecthome is a great project that will look good in your home and help keep your dog contained.
What You’ll Need
How To Build It
- First, decide which part of the door you plan to use. For smaller dogs, the top half is usually fine, for larger dogs you may want to go with the taller bottom half.
- Cut the door in half and then sand down the top. If the door has an old or rough surface, you can also sand it down and apply a coat of primer and paint.
- Mount support brackets on the wall and also attach hinges to your door half.
- Attach a self-closing latch to the wall on the opposite side and the top of the Dutch door and that’s it!
For those that want a visual Andrea has shared her tutorial of this baby gate in a video too.
6. Super Easy & Cheap Farmhouse Decor Doggy Door
Credit: @huckabeehome/instagram
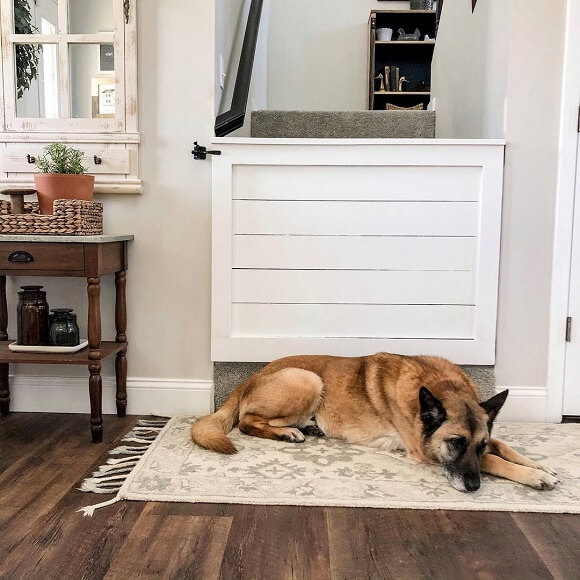
Those who are looking for a stylish yet highly functional doggy door to match a farmhouse decor look no further that this super easy and cheap alternative to the eyesore metal gate from Katie @huckabeehome.
What You’ll Need
- 2 T-hinges
- 1 gate latch
- 1 MDF panel (or a 3/8″ or thicker polywood if your dog is a jumper)
- 2 1×4’s wood panels. (2 @ 43″ (width for gate) and 2 @ 32″ (height for gate)
- oil based primer (Zinsser Primer is recommended).
How To Build It
- Attach your 1x4s together with pockethole screws and wood glue to make your frame.
- Next cut your MDF pieces down. Katie cut hers to about 6.5″. (Your measurements will be depend on how tall your vertical pieces are for the height of your gate. This can be changed up to fit your space.)
- Lay them out on the back of your frame to make sure everything lines up nicely.
- The saw blade can make the edges a bit rough. So be sure to sand them down with a medium grit sandpaper.
- When everything is fitting and nicely sanded, use a nickel to space out your MDF boards on the frame.
- Use wood glue and a brad nailer to attach the boards to your frame.
- Do any final sanding and get ready to paint using the primer.
- Attach the hinges to the backside of the gate and attach latch using drywall anchors.
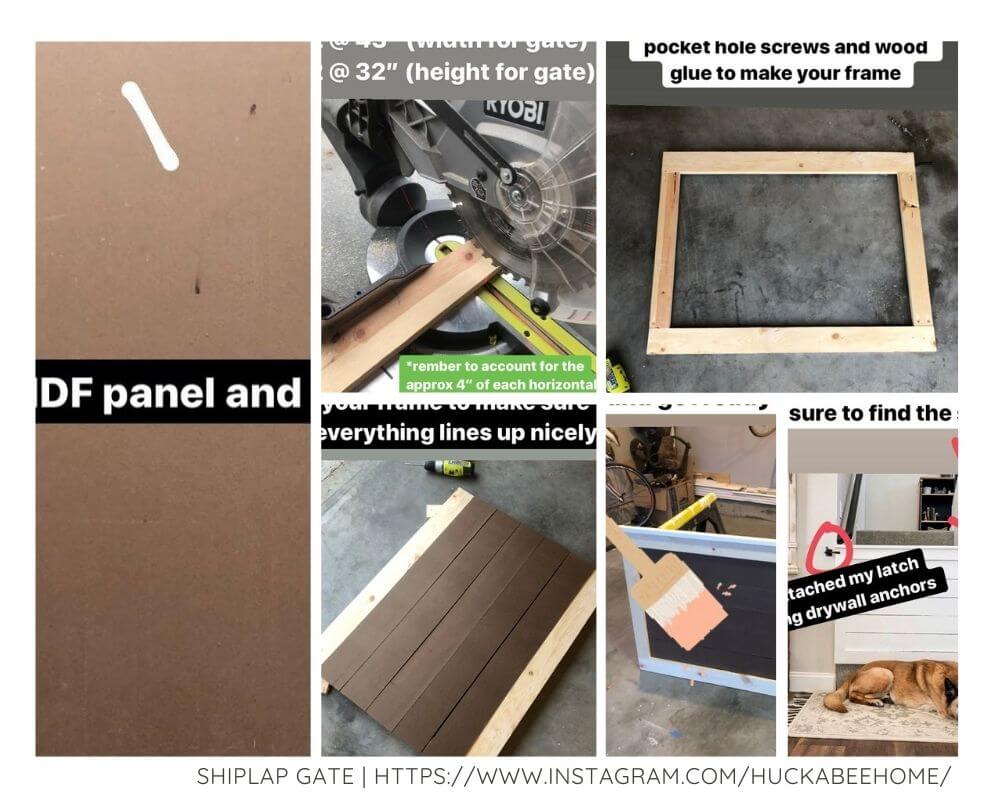
For a visual for each step in this tutorial watch Katie’s stories here.
7. Modern DIY Pet Gate
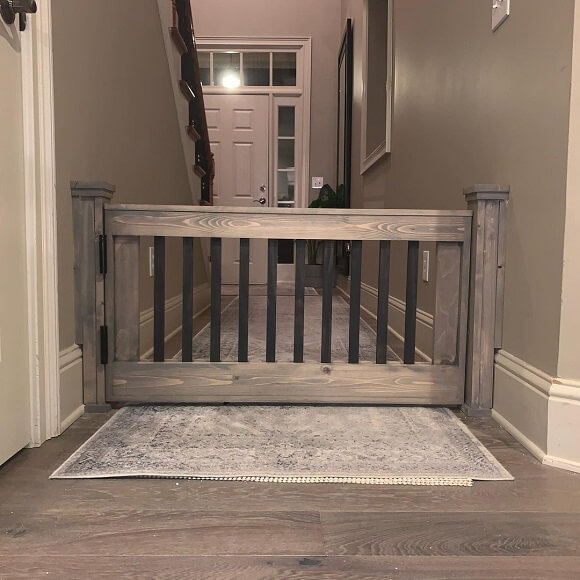
Credit: @majkowski_created/instagram
Here is some more detail of the project in her stories.
